My Homelab Setup: Hardware
Over the last few weeks, I’ve been working on building out my homelab setup. It’s something I have been working on for a while, but accelerated it due to having more time and wanting to build an online photo album for my son. In this post, I will go over my desk setup and the hardware I am using to manage the lab. I also use this space for working from home, and it’s been quite comfortable for me.
Desk Setup
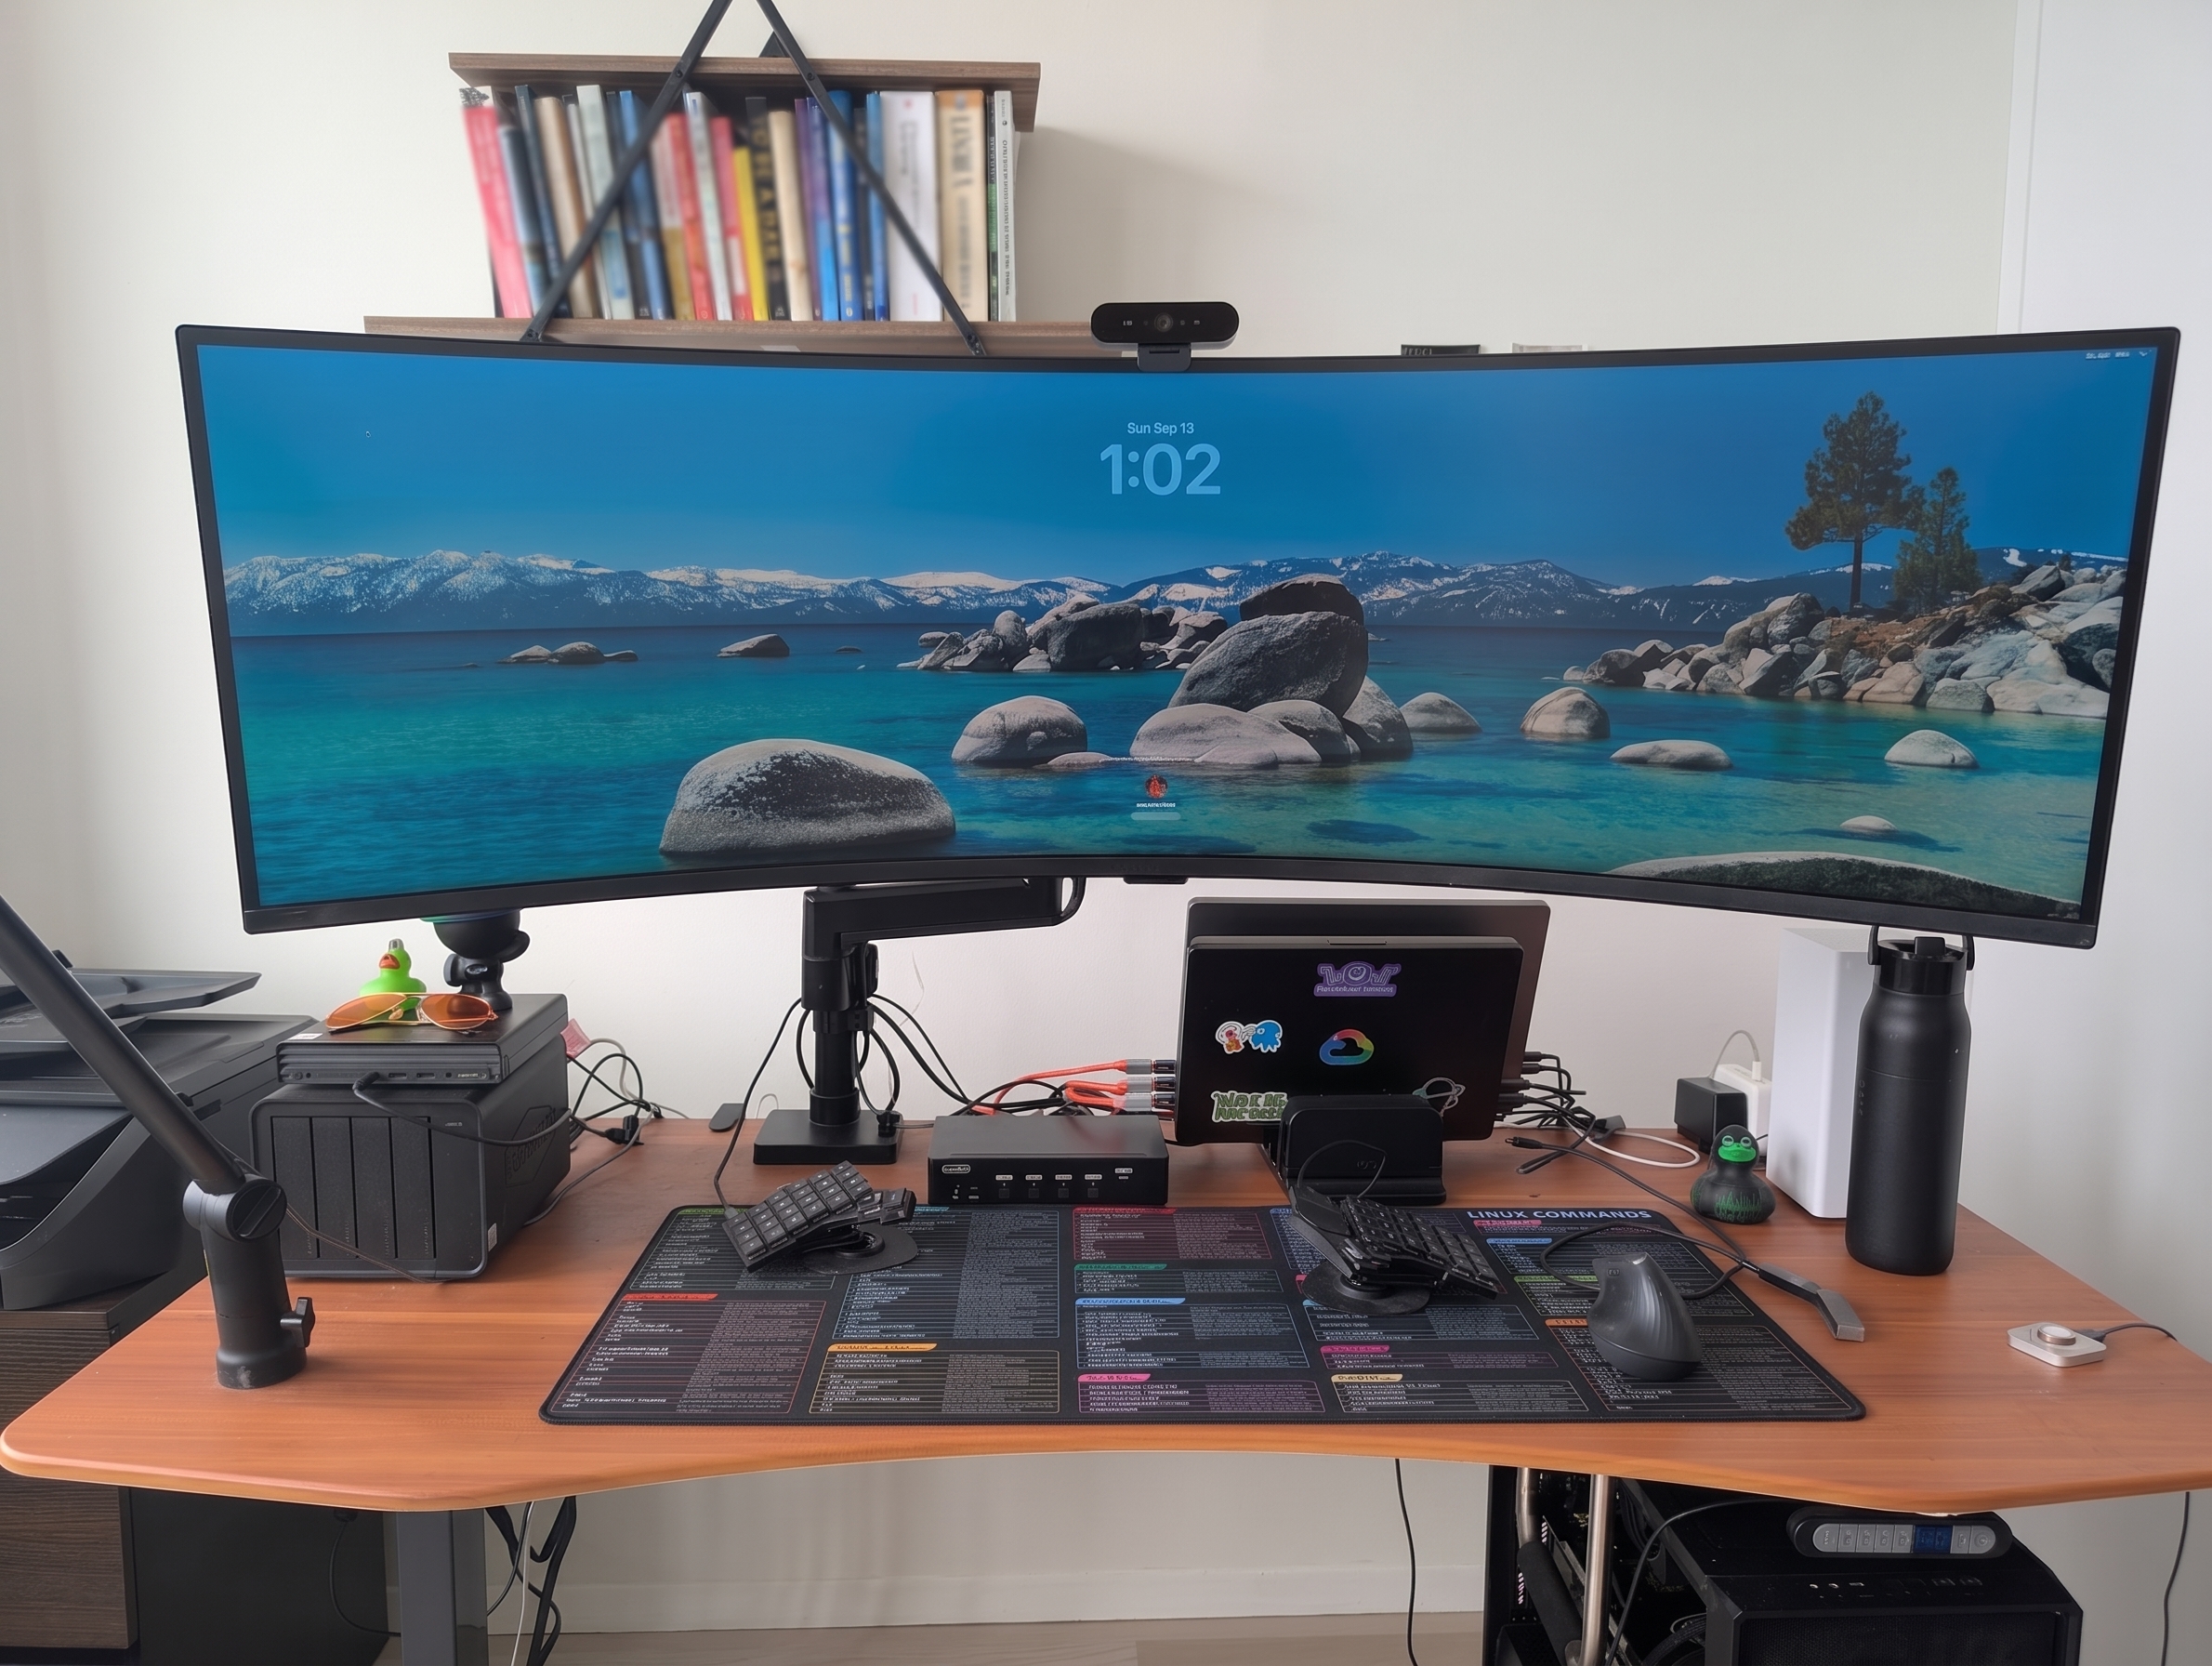
Monitor: Samsung Odyssey G9 49’’ 1000R Curved
Monitor Stand: Heavy Duty Monitor Arm for Ultrawide Monitors up to 57" and 44 lbs
Chair: Steelcase Gesture with Headrest
Keyboard: ZSA Voyager
Mouse: Logitech MX Vertical
Desk: Elite Pro Series 60" x 27" Electric Height Adjustable Stand up Desk
Microphone: Shure MV7 USB Microphone
Camera: Logitech Brio Ultra 4K HD
The Voyager keyboard was definitely the hardest adjustment I had to make with this setup, but it has been so worth it. I have wide shoulders and it feels more natural to type without having to fold my arms in. The monitor stand helps to create more space on my desk, as the ones that come with the monitor have wide legs to hold up all the weight. Finally, the Steelcase Gesture chair that I have was the priciest asset but has been incredibly worth it. I got the headrest with it as well, so that I am looking up at my monitor while I work. This helps to prevent neck strain on long working days.
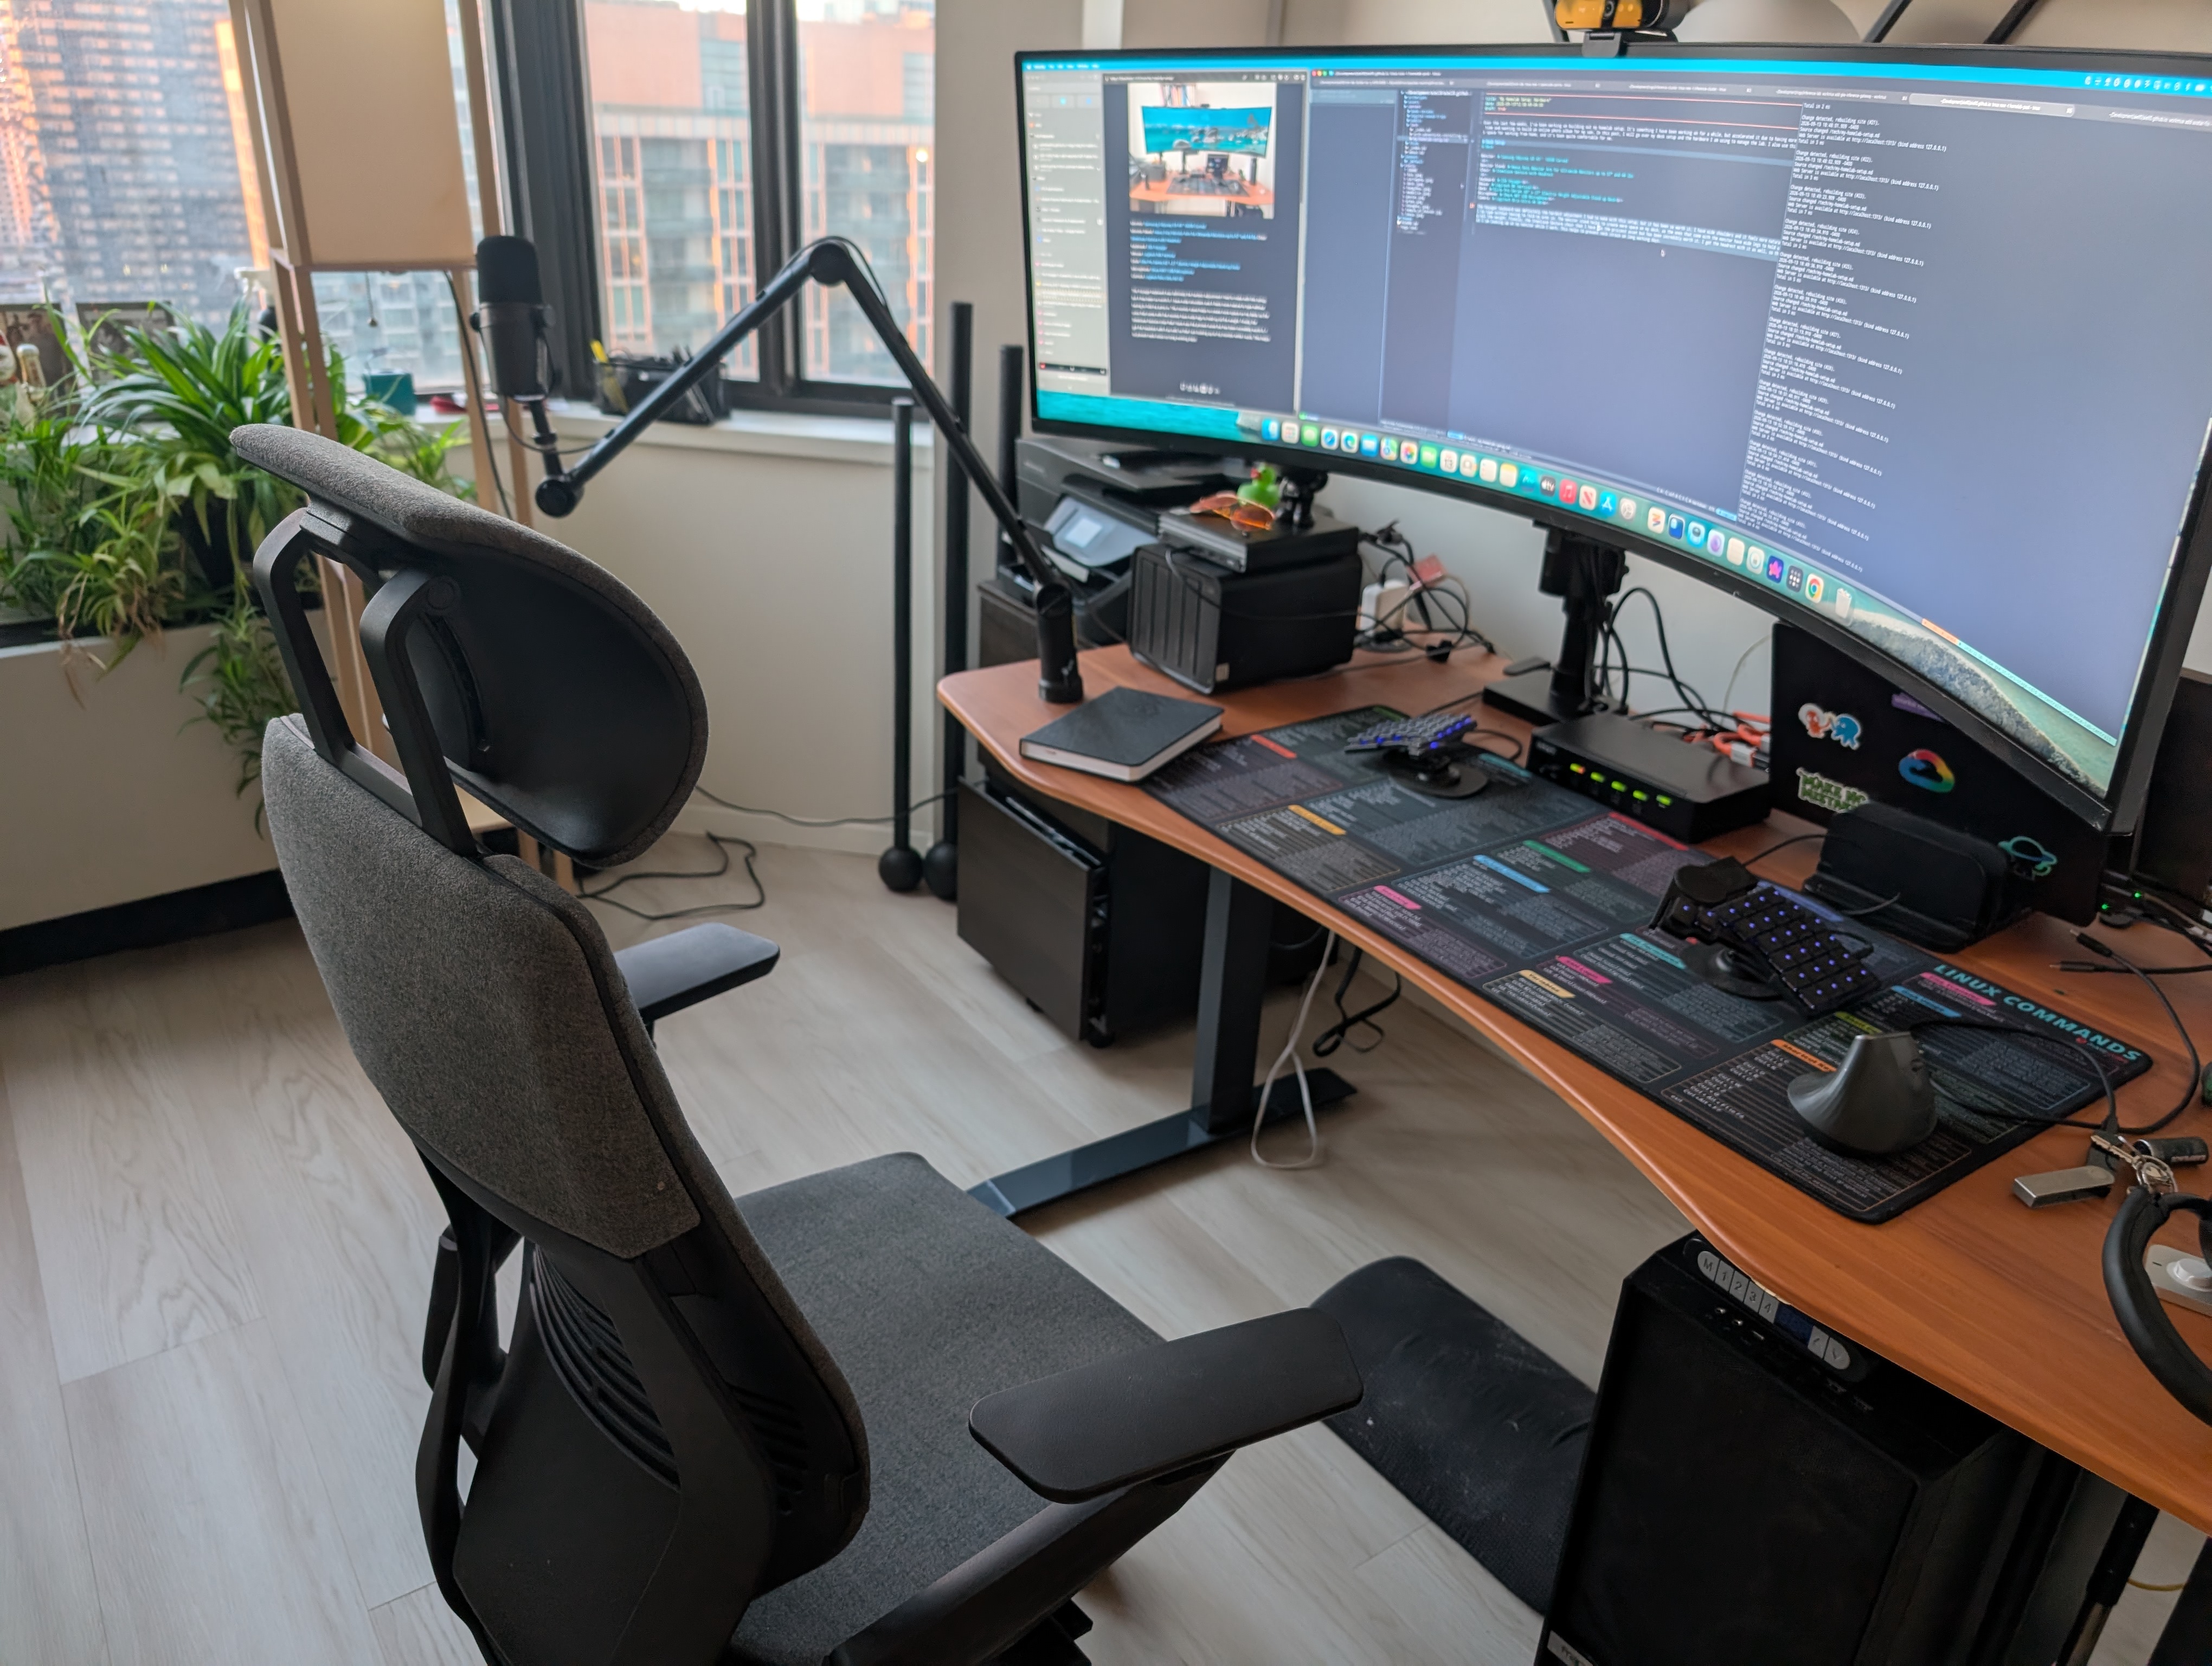
If you look closely, you will also see a desktop machine that is under the desk. Back in 2020, I bought a Steam VR machine just to play Half Life Alyx and I bought an Nvidia 3800 graphics card just so I could play it. It was worth every penny and I never regretted it even for a second. After I beat the game (like 5 times because it was so good) I repurposed it to mine Ethereum while it was still proof of work, and made enough to pay the card back. After they converted to proof of stake, this machine has basically been collecting dust ever since. I imagine at some point in the future I will buy some aftermarket GPUs so I could run local open source AI models. But for now, it lies dormant.
Multi-Macbook KVM
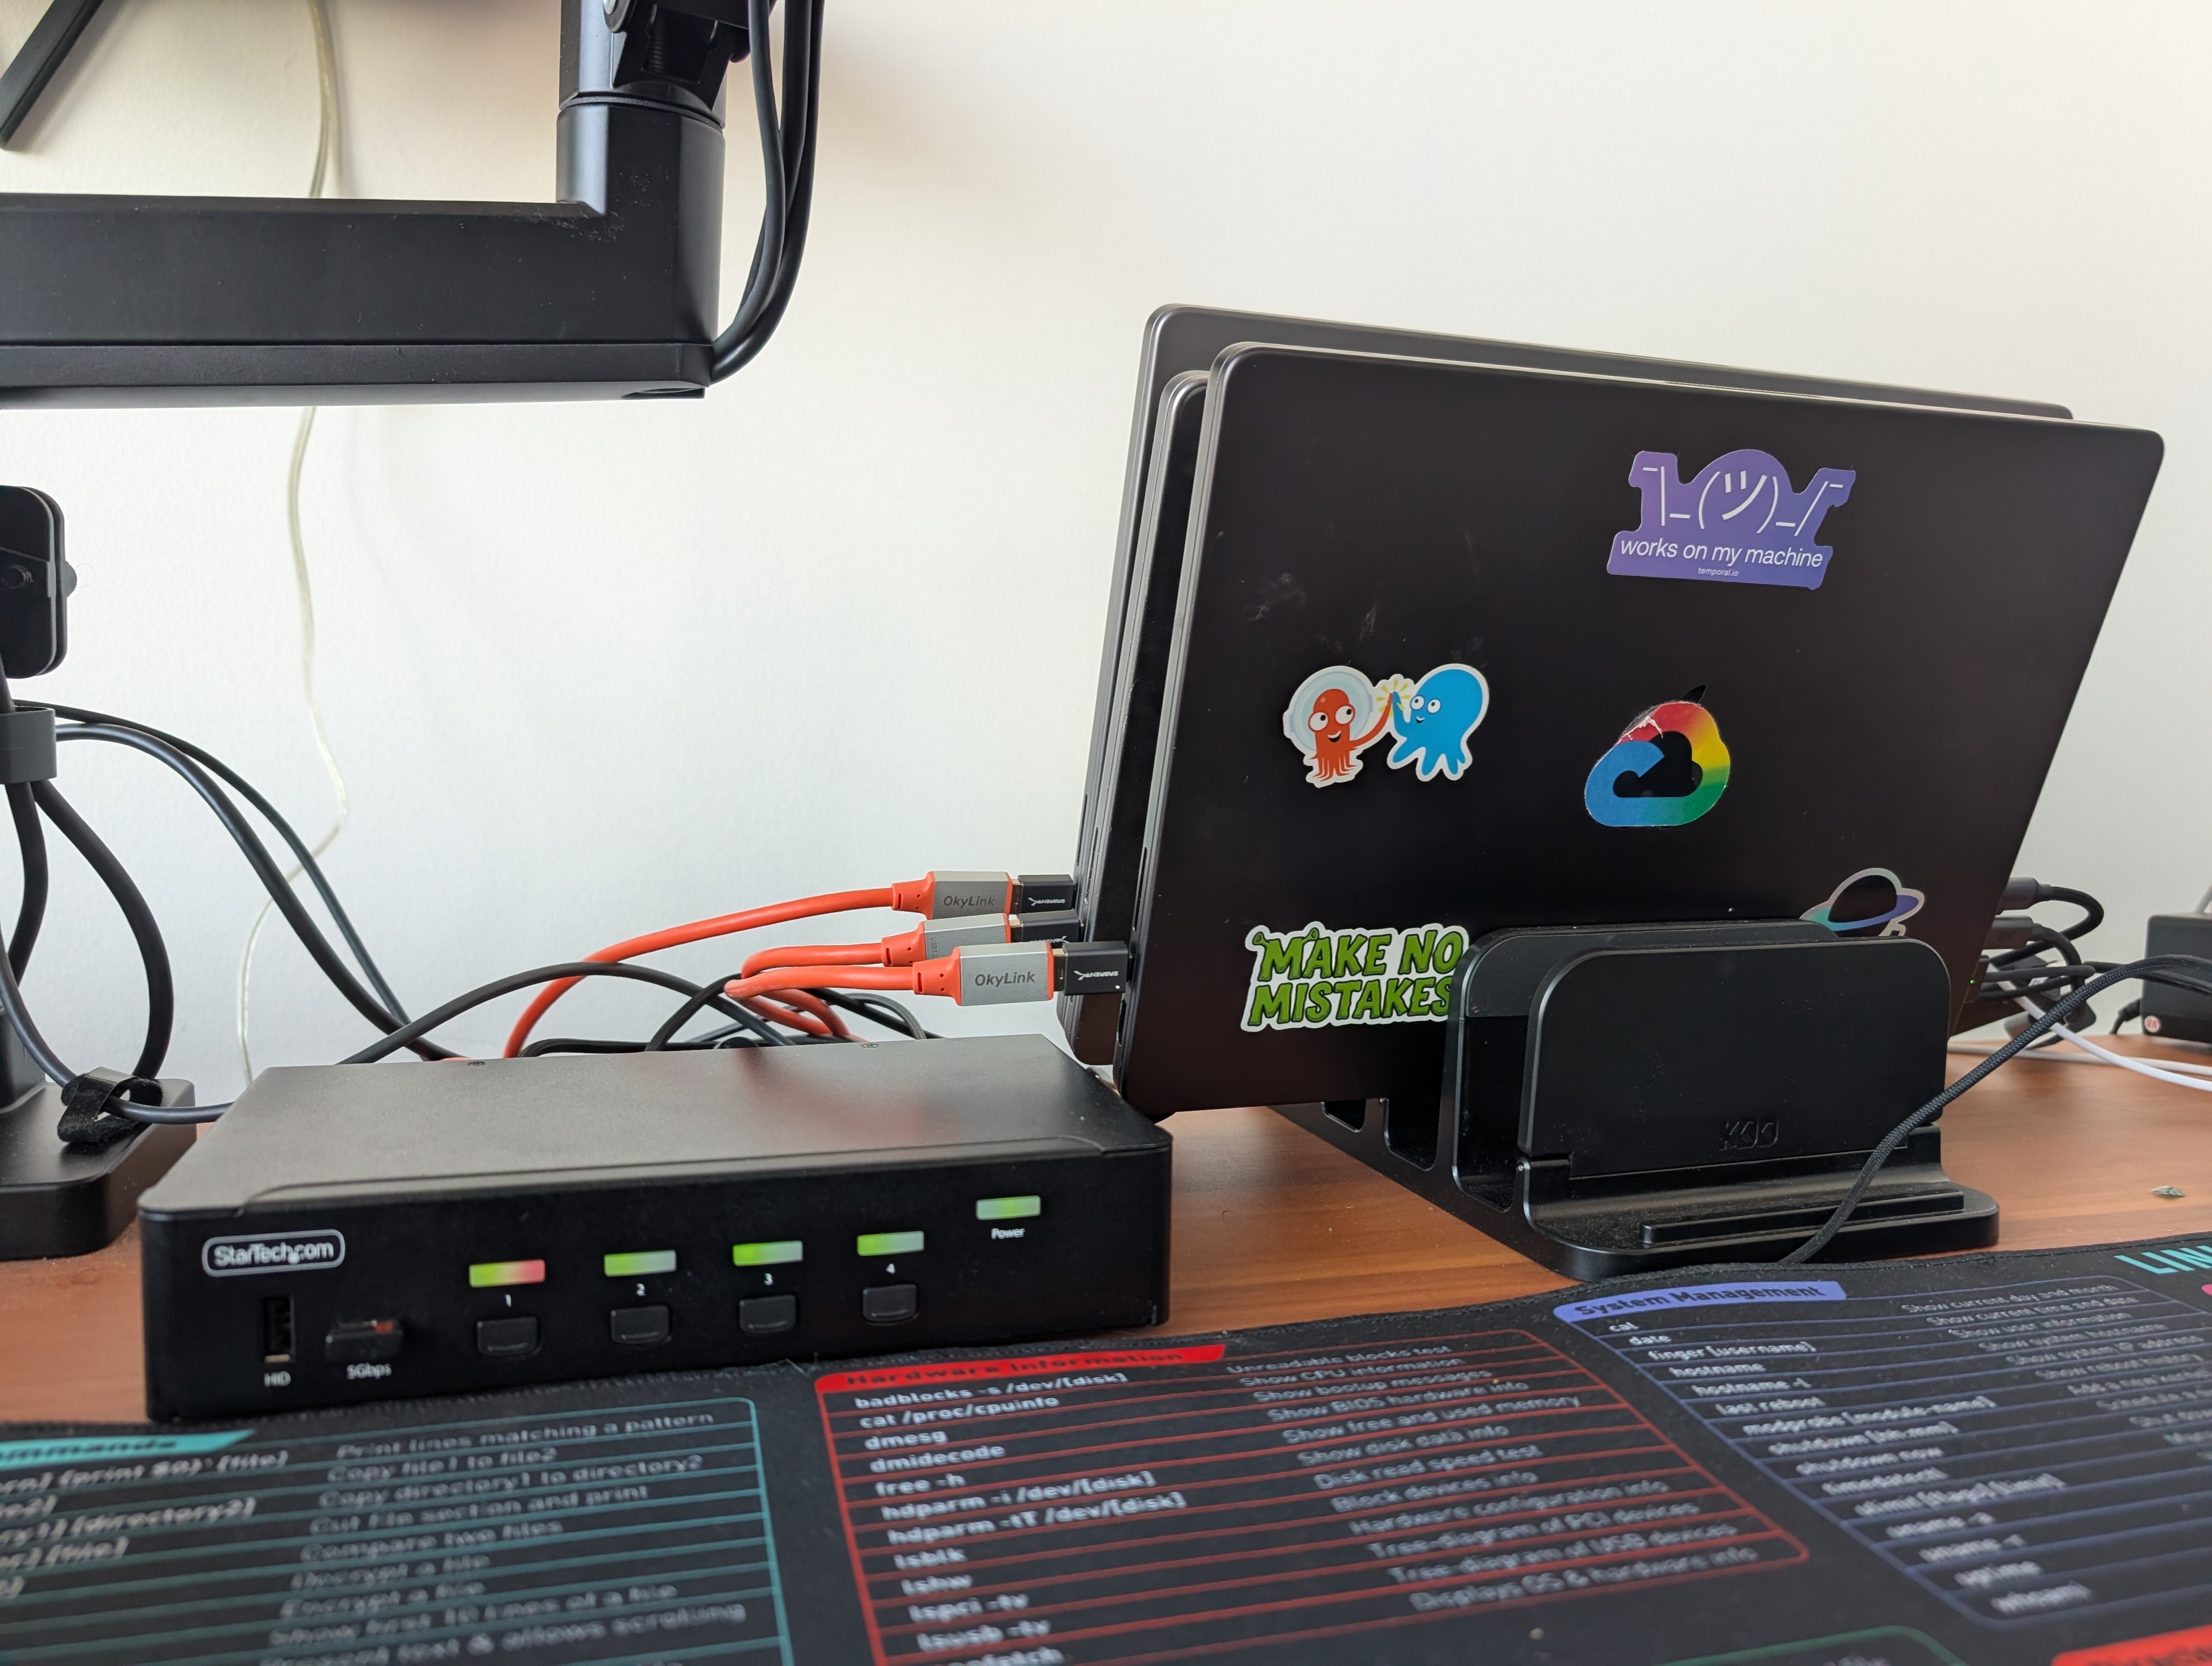
KVM: StarTech 4-Port DisplayPort KVM Switch
DisplayPort Cables: UGREEN Unidirectional USB C to DisplayPort 1.4 Cable
USB-C Cables: USB 3.2 Gen 2 USB-A to USB-B Printer NAS Cable
USB-C Adapter: Anker USB C Adapter
I have a total of 3 Macbook Pros (2 M1s and an M5) one of which I use for work, one from an old job, and a personal one. I decided I would hook all of them up to the Samsung G9 using a KVM so that I could switch between them all with the push of a button. The KVM also has all my peripheral devices attached, so I get to use my keyboard, mouse, microphone, and camera with all of them. A key thing to note here is to make sure you have the most updated versions of the DisplayPort and USB-C cables to ensure you are able to take full advantage of data speeds. For DisplayPort that is version 1.4, and for USB-C it is 3.2. I made a mispurchase here and had glitches with my monitor and peripherals until I fixed it.
Linux Server
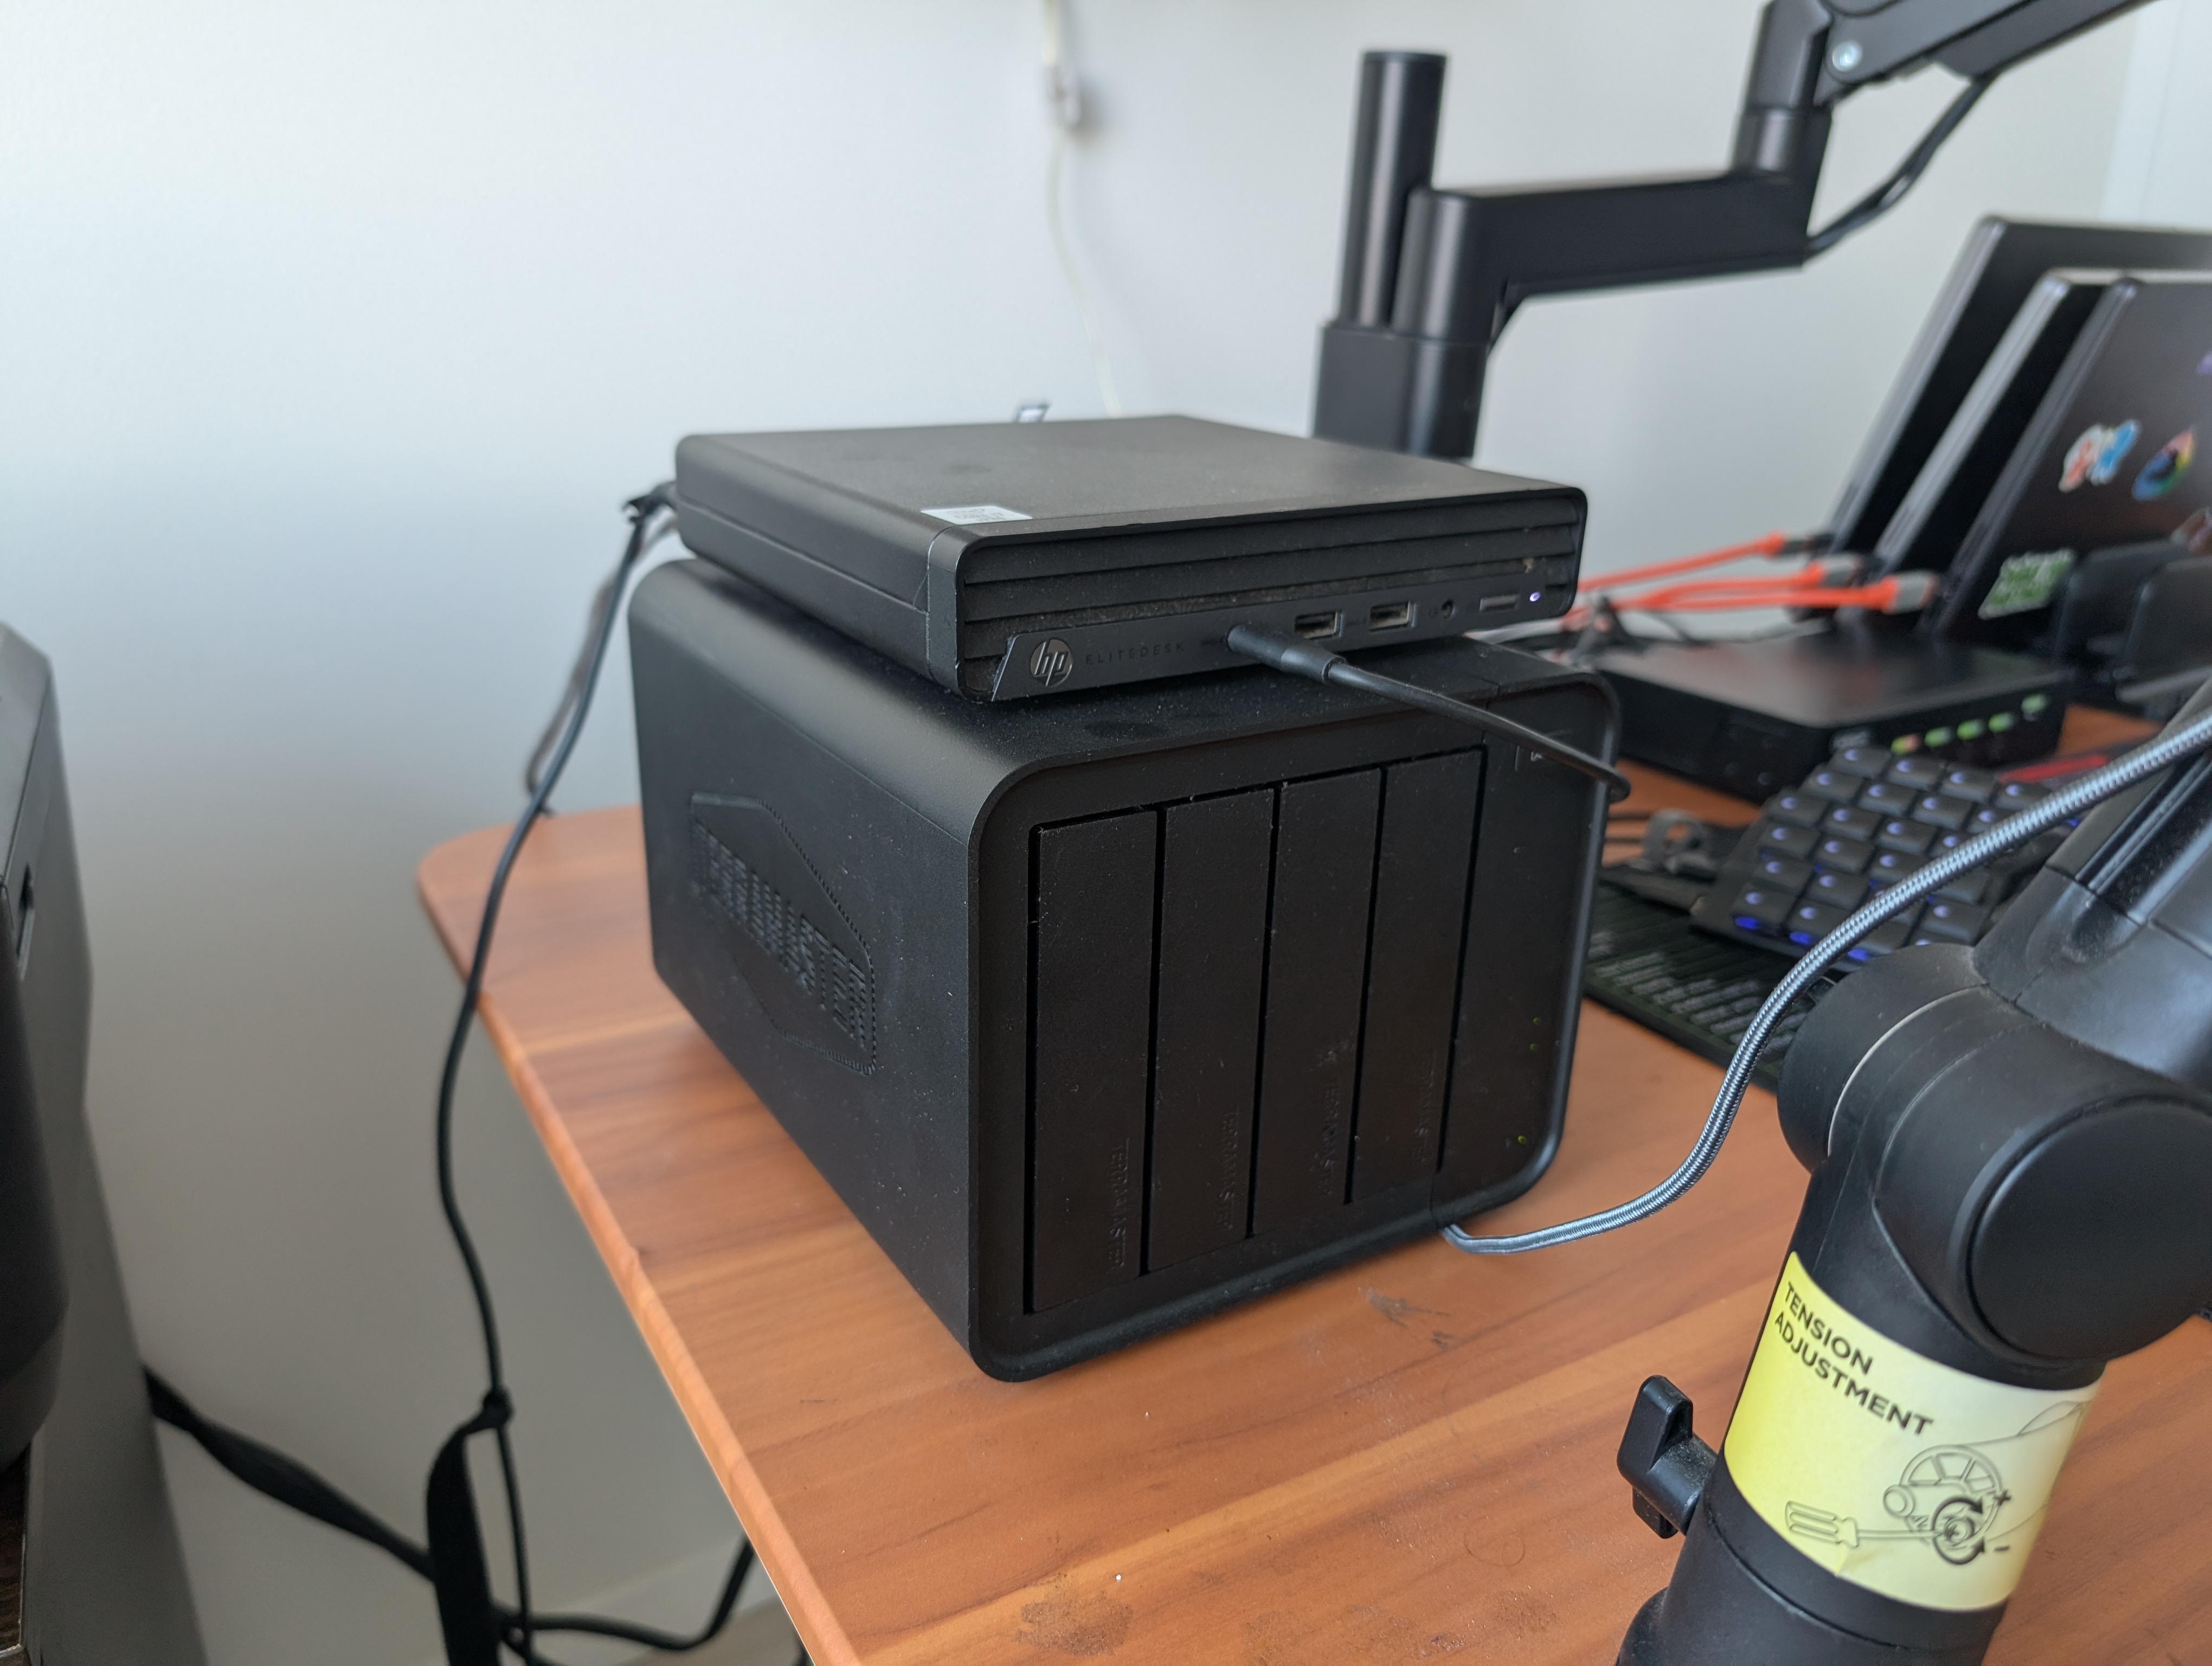
Hard Drives: Synology 8TB HAT3320 Plus Series
Hard Drive Enclosure: Terramaster D4-320
Mini PC: HP EliteDesk 800 G6 i7-10700T 512GB NvMe 32GB Mini PC
I wanted a Linux server I could use that was inexpensive, so I went on Ebay and bought this refurbished mini-PC. For the hard drives, my initial plan was to use this as media storage for my family photos, so SATA was just fine for that use case. I went with a DAS here as I wanted something that linked the drives together without the overhead of a NAS. To me, it was just another piece of software I had to update that I didn’t need. I manage the drives using ZFS installed on my server, which I will go over in a follow-up post. This server ended up becoming a Kubernetes control plane, and I have one of my old Macbooks as a worker node (in addition to the Linux machine).
Final Thoughts
I’ve probably poured about $8k into this setup over the last few years (most of that coming from the laptop and chair). I spend a lot of time working, and my mindset is you should spend a lot of money being comfortable in the things you spend the most time doing. The homelab was something I have always wanted for a long time as well, as it’s never been easier to try out new tools using AI-assisted coding. There are not only so many of my own ideas I would like to try, but there are a lot of open source projects that I could now contribute to with this setup. A homelab is a great way to test out tools you would like to introduce at work as well. With the proliferation of AI-assisted coding, the amount of tools to test out and integrate into business IT platforms will only increase.
In a coming post, I will go over the software tools I use to run my homelab. Message me if you have any questions about the tools that I am using here, and I will be happy to answer them!